Windows下Stable Diffusion WebUI使用AMD显卡本地部署

本文最后更新于:2024年3月20日 中午

Stable Diffusion(下称SD)是啥

Stable Diffusion 已经发展到可以生成以假乱真图像的程度,无论是 AI 作画还是照片生成都已经可以生成得很精细,本文记录使用过程。

本来不想写这段的,但是写上点更完整,减少搜索量(手动狗头)。

SD生成的图

SD生成的图

这东西是用AI作画的一种软件,算是NovelAI的离线版。但它的安装方法与Windows其他软件差别很大,要想让软件跑起来,对计算机硬件要求比较高,显存是比较重要的指标,显存大小直接影响了生成图片的尺寸。

SD有纯命令行和带WebUI之分,本文针对的是带ui的版本。这两个版本的安装方式稍有不同。

安装流程

前置要求

SD安装前,首先要有git和Python3.10(应该在3.10.6以上)。

注意,git是必须装的,从GitHub上把压缩包下载下来是不够的。安装过程中还会拉取在线repo,别图省事,别抖机灵。

git是种管理器,比如代码版本管理,文档版本管理等等。有了git之后相当于给程序做了N多快照,可以随时恢复到任何一个节点。

在这里git的作用更像一个下载器。

Python不用介绍了吧,如果不知道去搜索一下再回来吧。Python安装过程中选中“Add Python to PATH”,如果忘了选也问题不大,将Python安装路径和Scripts添加到环境变量即可,具体方法网上应该有很多,搞定之后再回来。

Adrenalin显卡驱动,这个东西不会有人不装吧?(AMD显卡不需要)

(可选)虚拟环境

很多教程里都用到了conda环境,其实这不是必须的,如果你没有其他Python使用需求,直接在系统里安装就可以。

这conda虚拟环境主要是应用于你需要多种不同版本的Python时,比如A软件需要Python3.7,B软件需要Python3.12,conda就派上用场了。

除此之外SD WebUI运行时会用到venv,这也是一种虚拟环境,只能用于隔离引用不同版本的程序包,不能用来指定不同的Python版本。另外要注意,virtualenvvenv不是一回事。好了,如果你用conda的话,似乎不太用考虑venv的问题,只要都在conda环境下就可以了。如果直接使用操作系统的Python环境,如果有些操作无效的话,尝试激活venv环境后再试一次。本文使用conda介绍。

如果使用anancoda创建的新的虚拟环境,需做以下配置:

webui-user.bat
修改这个文件,配置 VENV_DIRAnaconda 路径,例如:

1
set VENV_DIR=D:\ProgramData\anaconda3\Scripts

webui.bat
set PYTHON="%VENV_DIR%\Scripts\Python.exe 修改为:

1
set PYTHON="%VENV_DIR%\Python.exe

安装miniconda

安装包不放了,到官网下载即可。安装完之后开始菜单里就有了miniconda,里面有PowerShell和terminal两种方式,我的环境下PowerShell抱错,不知原因,无处下手,但是terminal是可以正常使用的,部署也都通过terminal设置,没有问题;但我还是推荐你使用PowerShell方式部署。

git下载repo

使用cd命令导航到一个空目录,或者用mkdir命令创建个新的

如果是使用CUDA,也就是Nvidia显卡的话,(要先安装上CUDA工具哦)用这句:

安装 CUDA 11.7
下载链接:https://developer.nvidia.com/cuda-11-7-0-download-archive

1
git clone https://ghproxy.com/https://github.com/AUTOMATIC1111/stable-diffusion-webui.git

AMD显卡用这句:

1
git clone https://ghproxy.com/https://github.com/lshqqytiger/stable-diffusion-webui-directml.git

就是下载文件到当前目录,AMD显卡还要下载下面两个库,直接给出命令了:

1
2
git clone https://ghproxy.com/https://github.com/lshqqytiger/k-diffusion-directml.git
git clone https://ghproxy.com/https://github.com/lshqqytiger/stablediffusion-directml.git

以上两个repo的下载位置无所谓,下载后将k-diffusion-directml文件夹中的全部内容(不要包括主文件夹)移动到“SD主目录\repositories\k-diffusion”下;将stablediffusion-directml文件夹中的全部内容移动到 “SD主目录\repositories\stable-diffusion-stability-ai”下。

接下来修改一下SD目录下的launch.py,主要是使用国内镜像下载库,比如说pytorch有2.3G的体积,如果不使用国内镜像下载起来就比较慢了(非必须)。用文本编辑器,打开launch.py,像上面一样,将

1
https://github.com

改成

1
https://ghproxy.com/https://github.com

改完后确认你修改的没有问题,别改多了。

然后还有一个关键步骤,使用文本编辑器打开SD主目录\webui-user.bat,在“set COMMANDLINE_ARGS=”后面加入“–precision full –no-half”,最终应该像这样:

1
set COMMANDLINE_ARGS=--precision full --no-half

我的显卡是RX 5600XT,只有6G显存,需要–no-half –medvram才能跑起来,不然一跑图显存必爆,如果有更小显存或者显存爆了,还可以试试添加–lowvram,内存小的话也可以试试–lowram,前提是有足够的显存,这种情况应该很少吧。

下载要使用的模型和LoRA

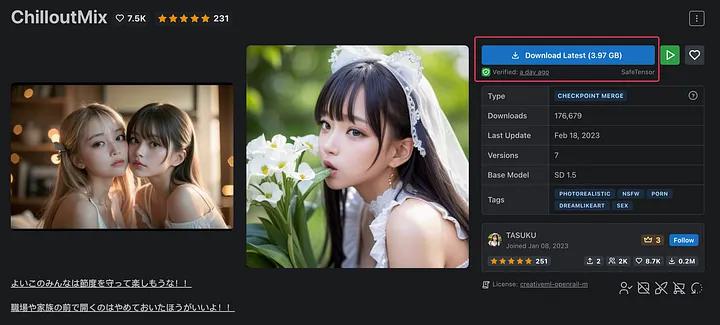
模型下载可以到https://civitai.com/models/6424/chilloutmix 下载作为基础模型,模型大小 3.97GB,下载完成后放在 models/Stable-diffusion/ 文件夹下,文件名为 chilloutmix_NiPrunedFp32Fix.safetensors。或到 Hugging Face – The AI community building the future.查找。

202303272311068.jpg

下载的如果是checkpoint类型的文件,放入“SD主目录\models\Stable-diffusion”中;LoRA类型放入“SD主目录\models\Lora”中。

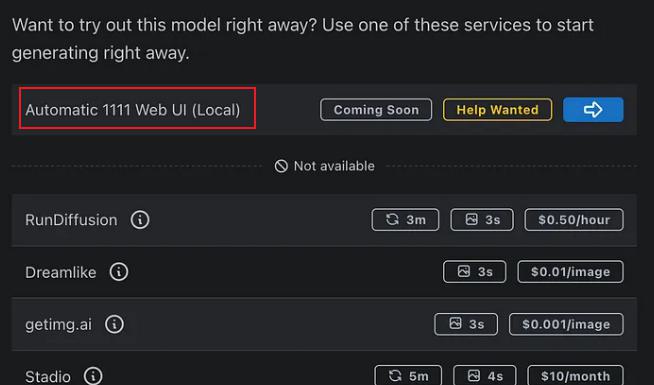
其余的可以在 CivitAI 访问下载,注意需要选择 Automatic 1111 Web UI (Local) 可用的:

202303272308162.jpg

自动补全程序运行所需要的包

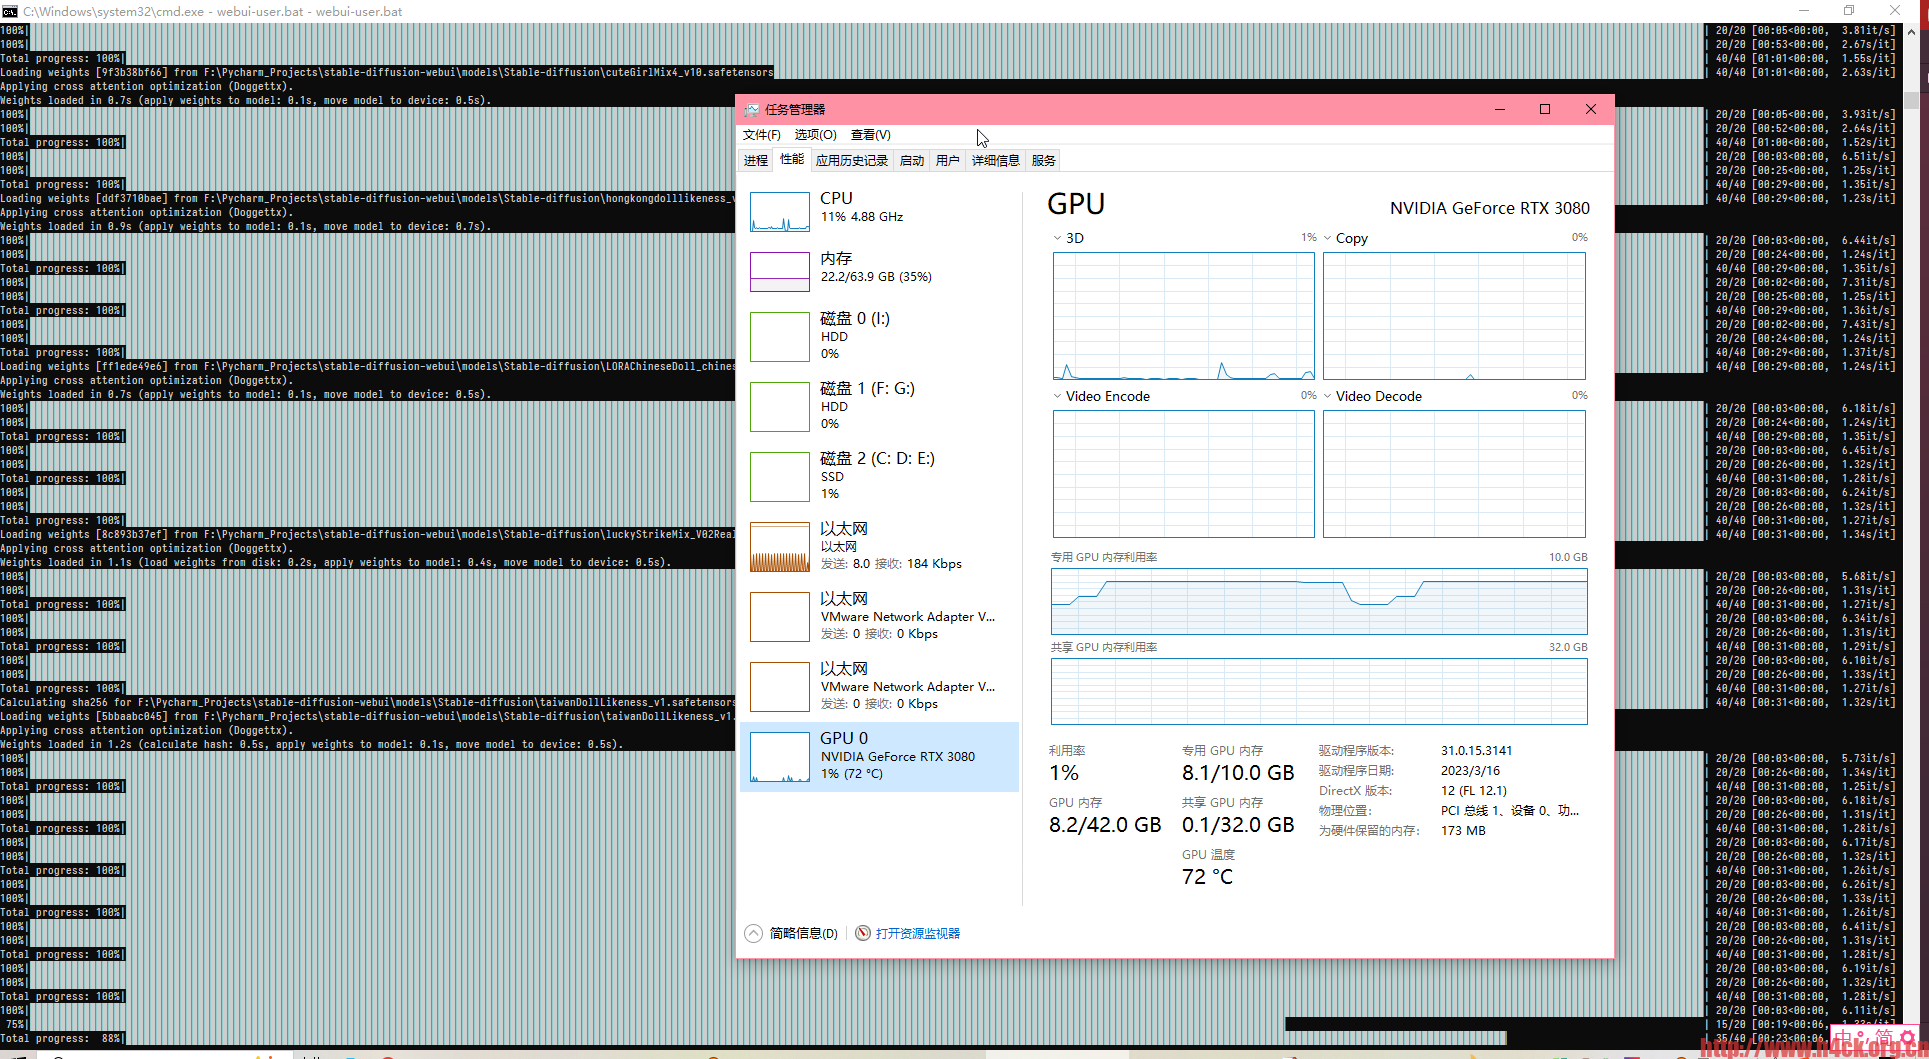
接着就是在conda中执行webui-user.bat,程序会自动下载所需要的文件并自动安装,这一步通常会持续一段时间,还可能会因为网络问题或者GitHub访问问题中断报错,如果是网络问题,重新运行一次就好了。如果是其他问题就得具体问题具体分析了。

conda中激活你要使用的虚拟环境,比如

1
conda activate -n 环境名

或者直接在开始菜单中选择miniconda命令行的快捷图标,直接继续。

像我目前还没有什么别的项目,加上懒,就直接用了base,如果一切正常,命令行应该像这样:

1
(base) C:\Users\jason>

前面的括号内就是现在的虚拟环境名称。

用cd命令导航到SD主目录下,然后执行

1
.\weibui-user.bat

由于需要通过github下载各种库,所以执行webui-user.bat之前,最好设置好梯子。以免文件下载失败,导致安装失败。

如果最终得到类似如下内容,说明启动成功了

1
2
3
4
5
6
7
8
9
10
11
12
13
14
15
16
17
venv "E:\sd\stable-diffusion-webui-directml\venv\Scripts\Python.exe"
Python 3.10.9 | packaged by conda-forge | (main, Jan 11 2023, 15:15:40) [MSC v.1916 64 bit (AMD64)]
Commit hash: c88824995d87be36a62b110dd509ff7ccb6eeaa2
Installing requirements for Web UI
Launching Web UI with arguments: --precision full --no-half
Warning: caught exception 'Torch not compiled with CUDA enabled', memory monitor disabled
No module 'xformers'. Proceeding without it.
Loading weights [fc2511737a] from E:\sd\stable-diffusion-webui-directml\models\Stable-diffusion\chilloutmix_NiPrunedFp32Fix.safetensors
Creating model from config: E:\sd\stable-diffusion-webui-directml\configs\v1-inference.yaml
LatentDiffusion: Running in eps-prediction mode
DiffusionWrapper has 859.52 M params.
Applying cross attention optimization (InvokeAI).
Textual inversion embeddings loaded(0):
Model loaded in 214.9s (load weights from disk: 2.3s, create model: 0.8s, apply weights to model: 151.1s, apply dtype to VAE: 0.1s, move model to device: 59.7s, hijack: 0.2s, load textual inversion embeddings: 0.6s).
Running on local URL: http://127.0.0.1:7860

To create a public link, set `share=True` in `launch()`.

Warning: caught exception ‘Torch not compiled with CUDA enabled’, memory monitor disabled.这句无需理会。

No module 'xformers'. Proceeding without it.xformers对使用AMD显卡来说无效。

然后浏览器访问http://127.0.0.1:7860 或者http://localhost:7860就可以访问所谓的webui了,个人觉得比命令行直观方便。

202303272234541.jpg

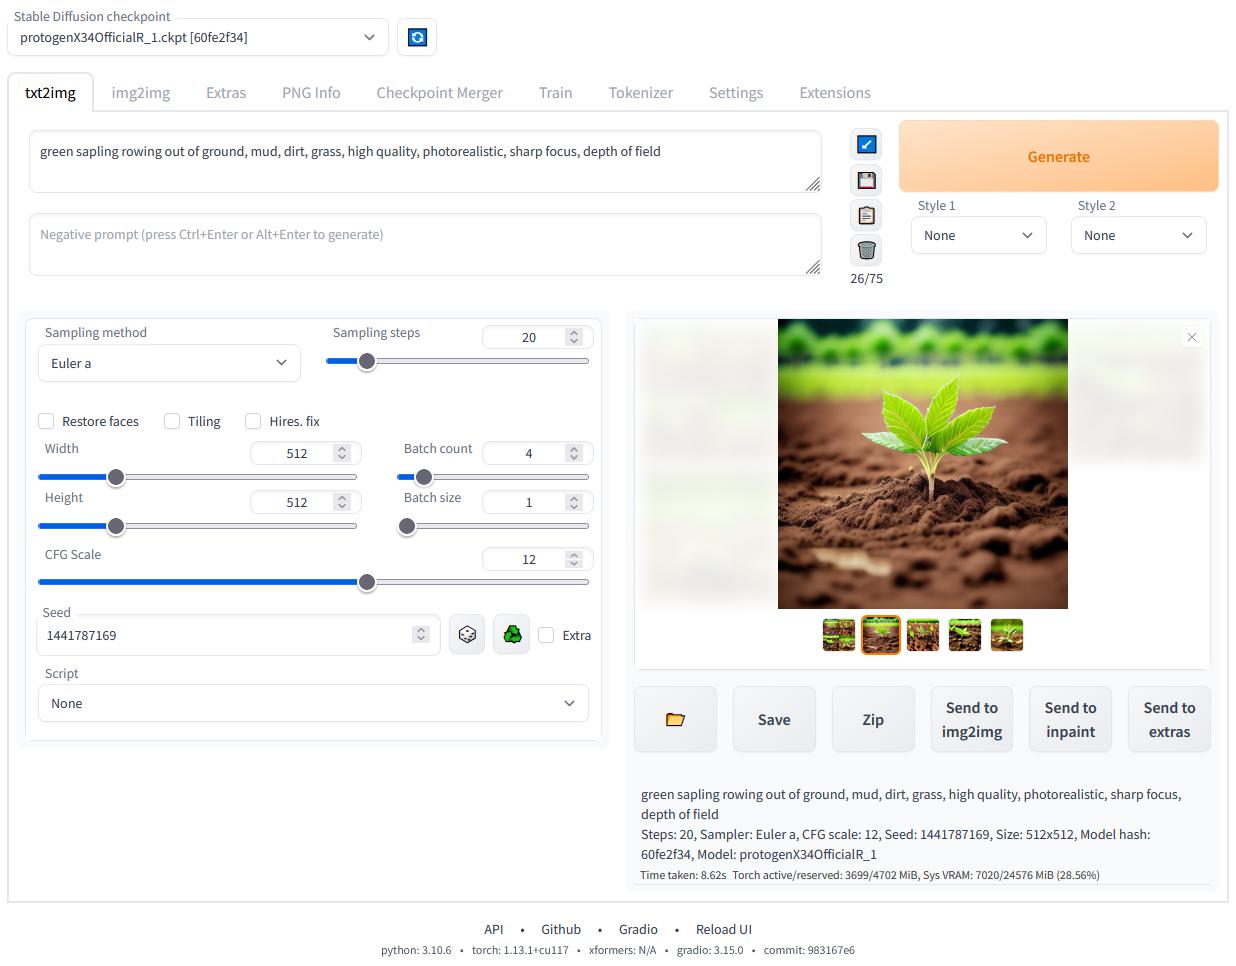
需要关注的就是prompt 和negative prompt 关键词,这两个关键词除了描述要生成的对象,更多的一部分是对ai生成的图片的一些限制说明,例如分辨率,不要生成卡通图片之类的。这些可以自己去尝试,我尝试了两组,效果还算不错:

1
2
3
4
5
6
7
8
9
10
11
12
13
14
15
16
17
第一组:
prompt:
<lora:addielyn_v1_chilloutmix_NiPrunedFp16Fix_100_33pic_epoc:0.6666> extremely detailed ((addielyn)), detailed eyes,

Best quality details:1.2),realistic,8K High definition,(1girl:1.2),Ultra Detailed,High quality texture,intricate details,detailed texture,finely detailed,high detail,extremely detailed cg,High quality shadow,Detailed beautiful delicate face,Detailed beautiful delicate eyes,Depth of field,Ray tracing,(a beautiful25age years old sexy korean woman:1.1),medium breast, tall_female, beautiful_legs, Glow Eyes,blush, perfect body,skinny, (black sweater:1.4), (open grey coat:1),(short plaid tight skirt :1.2), (stockings_garterbelt:1.1, stilleto:1.1), (bob cut:1.1), street, sunlight, kneeling on sofa, earrings,necklace, model, looking at viewer, from side, dynamic pose, mole under eye,

Negative prompt:
(worst quality, low quality:1.4),lowres,low quality anatomy,ugly,more than two people,split picture,split screen,two or more pictures,Ignoring prompts,individual screen,low quality four fingers and low quality thumb,complicated fingers,fingerless,extra limbs,signature,watermark,username,fat,Chubby,dark skin,ugly face,ugly nose,outline,low quality face,low quality eyes,polydactyly,low quality body,low quality ratio,broad shoulders,low detail clothes,cheekbone, animal, dolphin, latex, nsfw, posing, hands,

第二组:
prompt:
8k, RAW photo, best quality, masterpiece:1.2), (realistic, photo-realistic:1.37),1girl,cute,cityscape, night, rain, wet, professional lighting, photon mapping, radiosity, physically-based rendering,

8k, RAW photo, best quality, masterpiece:1.2), (realistic, photo-realistic:1.37),1girl,cute,cityscape,sunny , professional lighting, photon mapping, radiosity, physically-based rendering,full body

Negative prompt:
paintings, sketches, (worst quality:2), (low quality:2), (normal quality:2), lowres, normal quality, ((monochrome)), ((grayscale)), skin spots, acnes, skin blemishes, age spot, glans

chatgpt生成的Prompt关键词效果一般,可能是我问的方法不对~~

可以切换不同的模型进行尝试

对于我的电脑来说512*512基本就是极限了,显存基本跑慢了,如果到1024直接就崩溃了提示内存不足:

github上也给出了具体的解决方案:https://github.com/AUTOMATIC1111/stable-diffusion-webui/wiki/Troubleshooting,我还没尝试,等后续有时间再尝试。

最后上一张我自己生成的图吧

202303272325180.jpg